How to remove the drum from the washing machine?
 The need to remove the drum from the washing machine may occur due to a number of breakdowns. For example, wear of the bearing unit or deformation of the cross. To get the tank, you will have to almost completely disassemble the machine. We'll tell you how to do it yourself, at home.
What will be needed for repairs?
To remove the drum from the washing machine, you will first have to remove the tub. You will need to disassemble the SMA body by removing the top, front and back panels. After this, the engine, heating element, drain pump and other internal elements are removed from the machine.
The following tools will be useful during the work process:
- Phillips and minus screwdrivers;
- a set of keys;
- screwdriver;
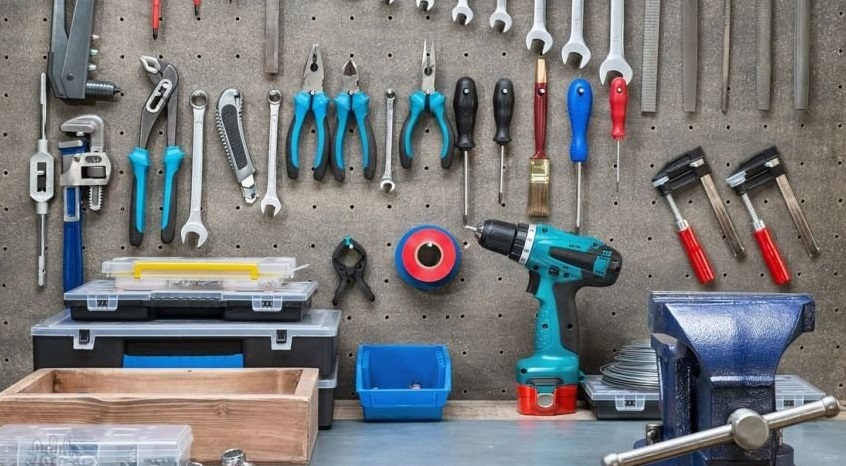
- small hammer;
- punch;
- a hacksaw or other tool for cutting (if the tank of your automatic machine is non-separable).
It is also worth having a marker and WD-40 spray on hand. The spray will help remove “stuck” fasteners. It is advisable to have a camera and take photographs of the progress of work - the photographs will help you avoid mistakes when assembling the washing machine later. Having prepared everything you need, you can begin the repair.
We remove the tank from the SM body
Before disassembling the SMA, it is advisable to study the instructions for the machine, namely, to understand the location of the internal parts. If you understand where, for example, the motor, pressure switch and other elements are located, then it will be easier to dismantle the components.
Be sure to turn off the power to the washing machine before you begin disassembling the cabinet.
After unplugging the machine from the power supply, move the washing machine to the middle of the room. Next, disconnect the device from the water supply and sewerage. Then you need to:
- remove the top cover of the MCA;
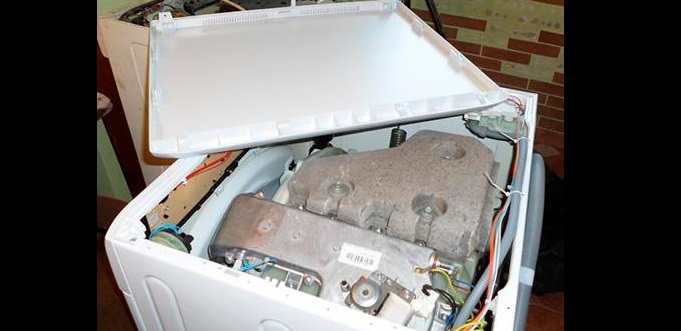
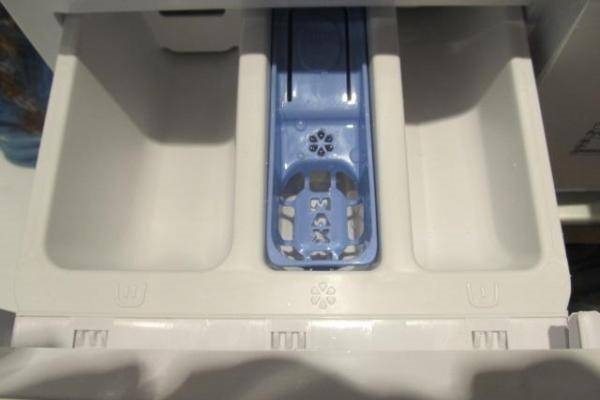
- pull out the powder tray;
- unscrew the screws securing the control panel;

- remove the instrument panel by disconnecting the wires supplying it;
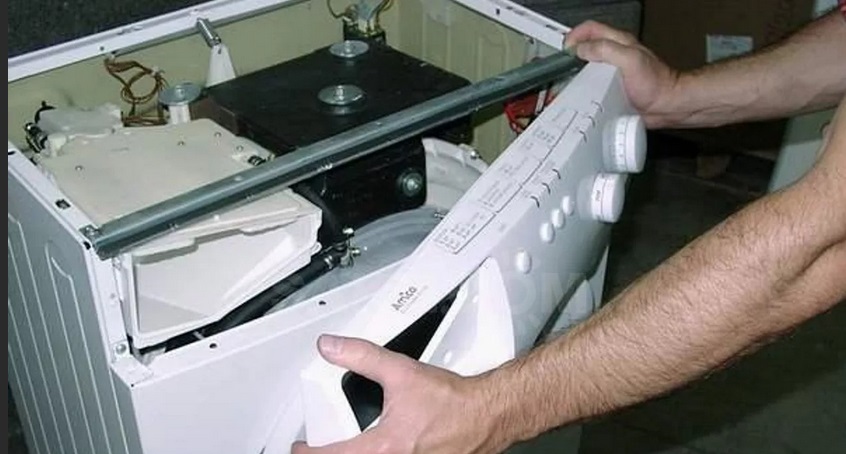
- remove the lower decorative panel;
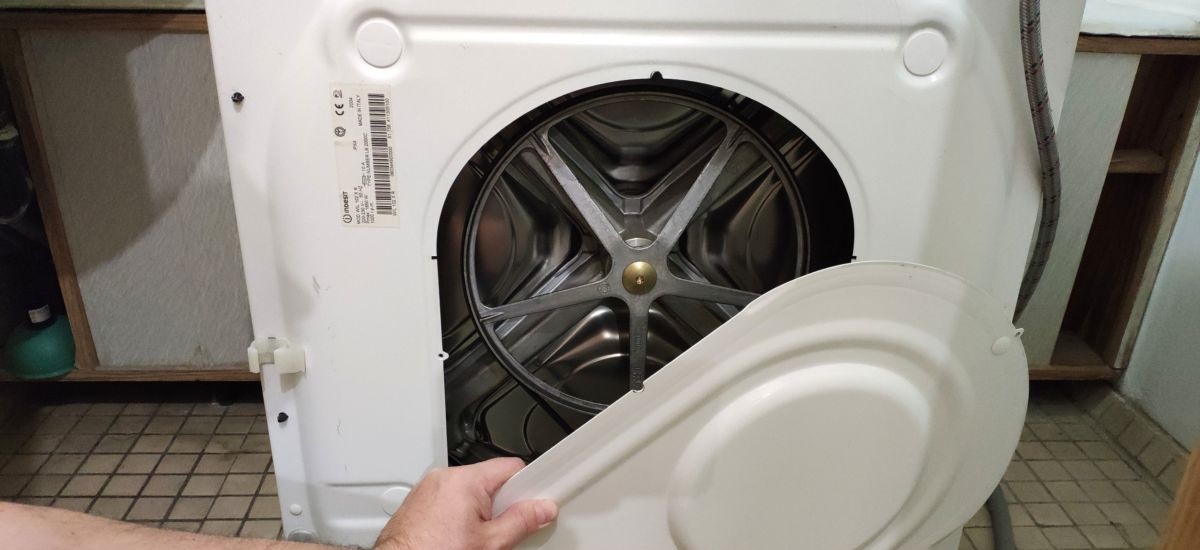
- open the SMA hatch and remove the clamps securing the drum cuff;
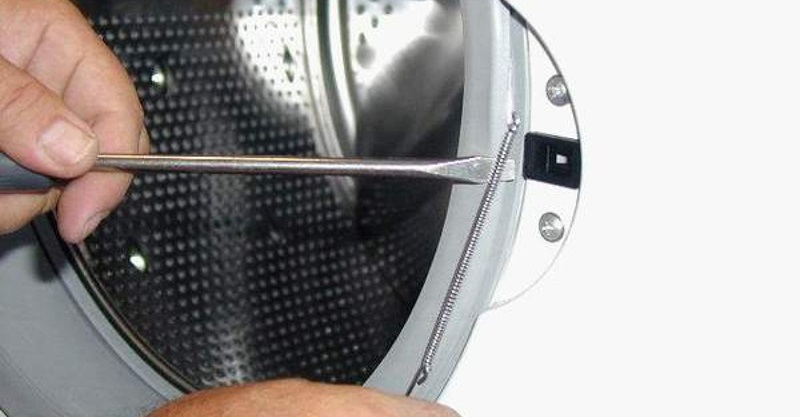
- remove the sealing collar;
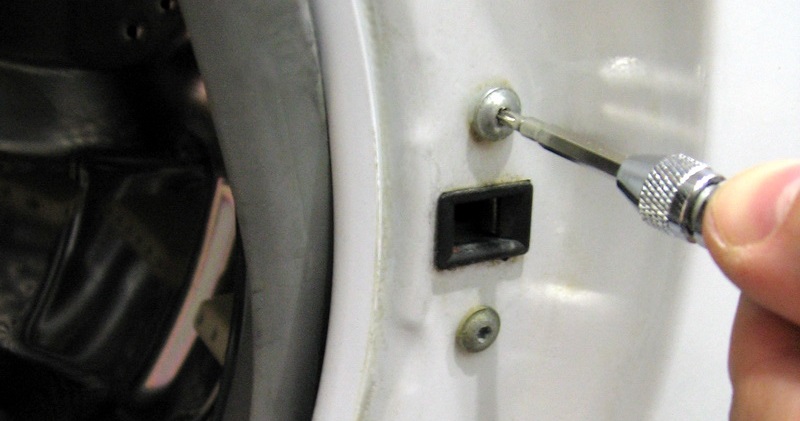
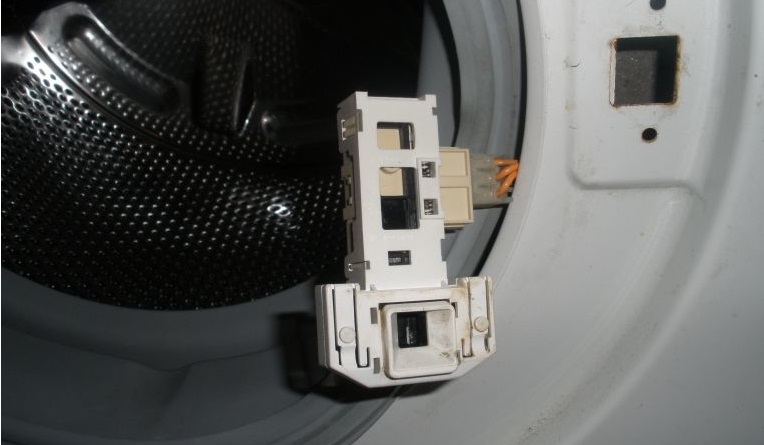
- Unscrew the screws securing the UBL and remove the blocker;
- remove the bolts around the perimeter of the front wall of the case, remove the panel;
- remove the back panel of the machine;
- reset the drive belt;
- disconnect all elements connected to it from the tank: sensors, hoses, motor, pulley;
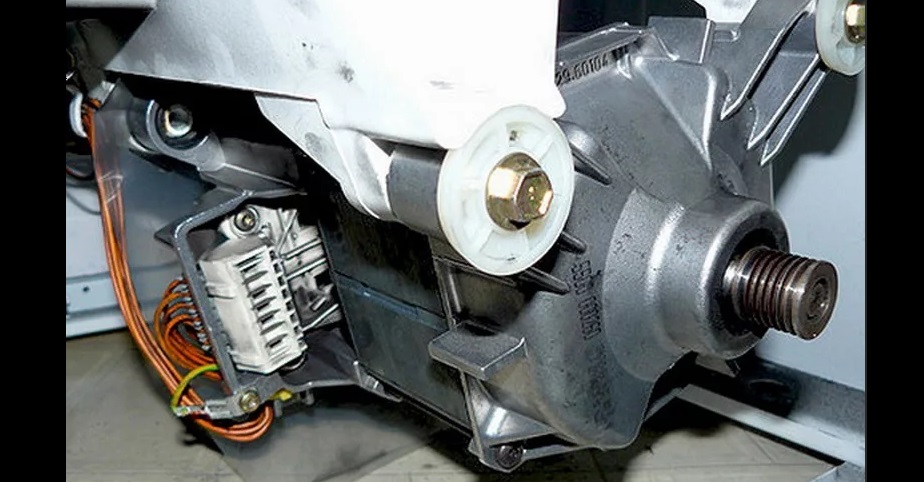
- Having dealt with the shock-absorbing springs, pull the tank out of the housing.
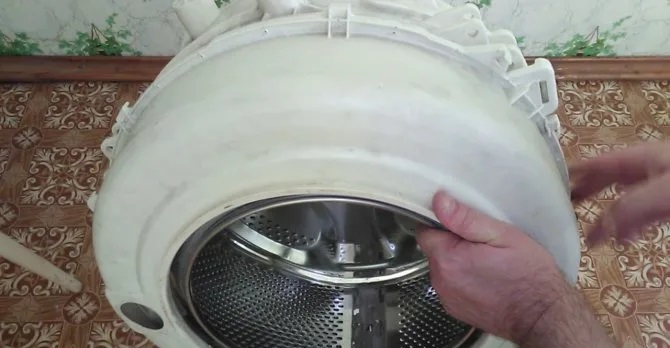
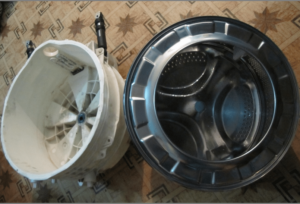
Afterwards the tank is placed on a flat horizontal surface. Now your task is to halve the plastic container. We'll tell you how to do this.
“Halve” the plastic tank and remove the drum
An important nuance is what kind of tank your washing machine is equipped with, collapsible or monolithic. In the first case, there will be no difficulties in halving the container. It will be enough just to remove the fastening screws, release the latches, and the tank will split into two parts.
It’s more difficult if the tank of your automatic washing machine is non-separable. In this case, the container will have to be sawed. You can do this using the following tools: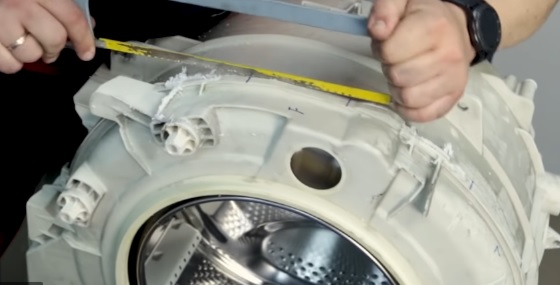
- hacksaw for metal;
- renovator;
- Bulgarian;
- cutting saw.
It is recommended to cut a non-separable tank exactly along the weld seam.
First you need to mark the cut boundary. Take a marker and draw a line. Next, arm yourself with the tools you have. Be sure to wear safety glasses to prevent flying chips from getting into your eyes during work. The renovator and cutting machine cut thinner than a grinder, so it is advisable to use this equipment.
Another advantage of a cutting machine is the ability to cut with curves. Then it will be easy to bypass important structural elements on the tank. For example, this applies to stiffeners.
Having cut the tank, proceed further. Remove the top “empty” part, and place boards under the bottom on both sides. Remove the pulley.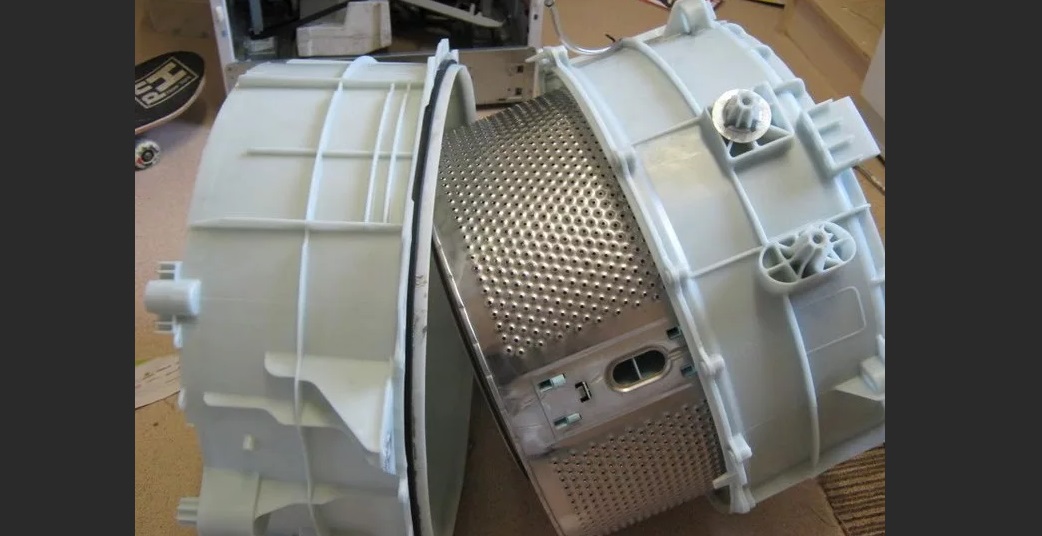
Then spray the pulley mounting area with WD-40. Wait 10-20 minutes for the composition to take effect. Take a drift and a small hammer and start hitting the center so that the drum pops out of the plastic container.
This will complete the drum removal process. Now you can begin troubleshooting: replacing the bearings, oil seal or crosspiece. Having finished the repair, you will have to put the structure back together.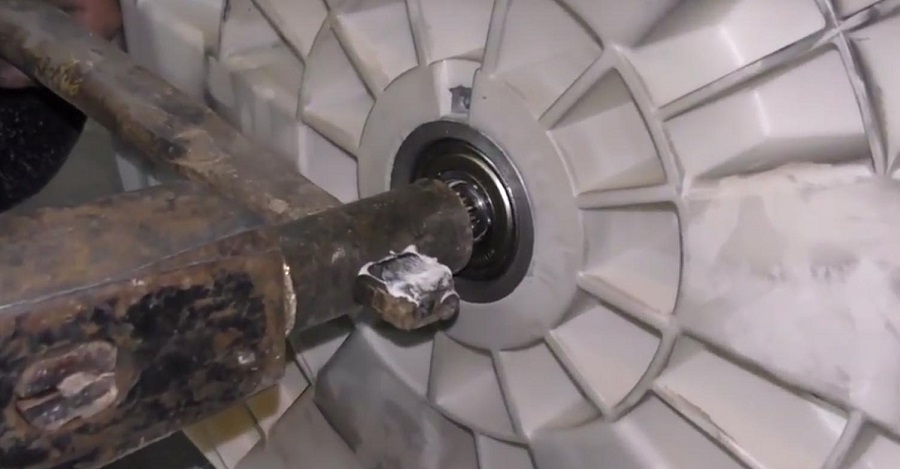
Place the drum back into the lower half of the tank. Reattach the pulley. To fasten the two halves of the plastic container you will need a hair dryer and a soldering iron.
Place the top of the tank on top of the bottom and “tack” the rims with a soldering iron in four or five places. This is necessary so that the sawn-off half does not “walk.” After this, gradually seal the container by heating 2 cm of plastic with a hairdryer and leveling the already softened area with a soldering iron.
Experts recommend additionally fastening the tank halves with bolts, at a distance of 5-10 cm from each other, for greater reliability. If you do not want to solder, you can use a special silicone sealant. In this case it will be necessary: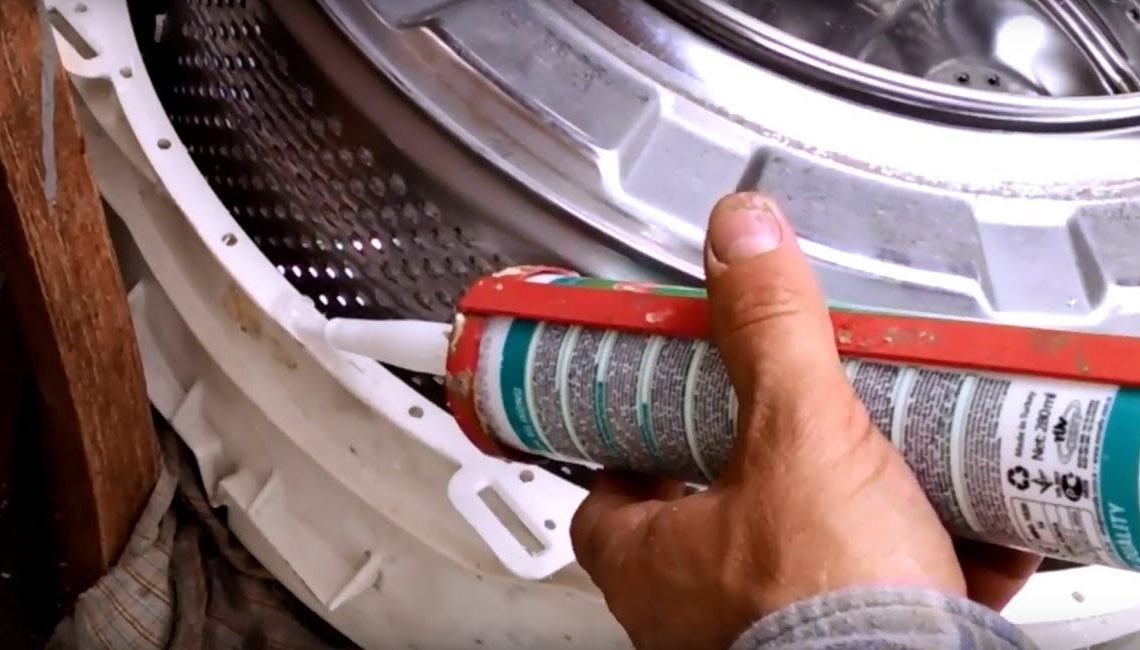
- clean the cut points on both halves of the tank;
- apply heat-resistant sealant around the circumference;
- place parts of the tank on top of each other;
- Place a weight on top and wait for the composition to dry completely.
By connecting the halves of the plastic container, you can begin assembling the automatic washing machine.It is performed by analogy, in reverse order. First, the tank is installed, pipes and parts are connected to it, the main elements are returned to their place: motor, pump, heating element, pressure switch, etc. It is better to rely on previously taken pictures to avoid mistakes.
Next, you need to activate the test cycle. Watch the machine in action. There should be no extraneous noise or leaks. If everything is fine, you can start a regular wash with the laundry in the drum.
Interesting:


Reader comments
- Share your opinion - leave a comment
Categories
Washing machine repair


For buyers


For users


Dishwasher


Add a comment