The drum rubs against the rubber band in the washing machine
 Rubbing the rubber band against the drum of the washing machine is a fairly common situation that can happen with any machine. There are usually three reasons for this: either a defect, which is especially true if the washer is from the budget segment, or the seal was incorrectly fitted and installed during a planned replacement, or there are problems with the cross or bearing assembly.
The first two reasons arise only immediately after purchasing the machine or repairing it, and the third problem appears several years after the active use of the “home assistant”. Regardless of the reason, there is no need to endure the sound of friction, because if the drum rubs against the cuff of the hatch when rotating, then this is an obvious signal that repair of household appliances is urgently required. Let's talk about the main ways to fix this problem.
How to get rid of friction?
There are many ways to fix friction on a cuff, but not all of them are suitable for housewives and beginners without repair experience. Some experts recommend loosening the clamps, and then removing the rubber band with your own hands and adjusting its position again. But this method is only suitable for service center specialists, since this cannot be done with every washing machine, plus, you need to know exactly how to properly dismantle the cuff, and how it should then remain in place.
There is another professional method, but it is even more complicated and dangerous, because you can permanently damage the parts of the washing machine. Specialists first remove the rubber band, and then use a knife to trim the edges that cling to the drum.The risk is that a person without knowledge may simply not determine the exact point of friction where it is necessary to cut with a utility knife. Fortunately, there is a simple and harmless repair method that any washing machine owner can handle. What to do?
- Purchase or prepare sandpaper.
It is better to choose sandpaper with a grit of 60 units or more, it will do the job better, plus, it can be purchased inexpensively at any hardware store, so repairs will not take a lot of money.
- Open the car hatch automatically.
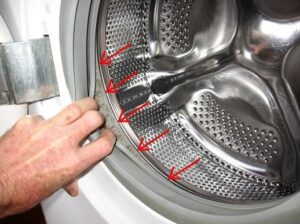
- Fold the sandpaper in half with the grain side facing out and insert it between the drum and the rubber.
- Holding the paper, rotate the drum until the protruding edges of the cuff are erased.
This method is not ideal, since you will have to spin the drum for a long time, namely 100-120 times. But the main advantage of this repair option over others is that there is no risk of damaging the elastic band or the washing machine itself. After this procedure, you need to run a test wash and listen to the operation of the machine. If the friction sound has disappeared completely, then the problem has been resolved, and if not, then simply repeat steps 2 to 4 again.
Cuff rubbing is a bad sign
But sometimes the drum rubs against the cuff not because the elastic is installed incorrectly. If friction does not appear immediately after purchasing a washing machine or a planned replacement of the rubber seal, but several years later, then this is a signal that the cross is being destroyed. This is considered a serious problem, because it leads to play in the drum, which changes its trajectory and begins to cling to the body of the “home assistant”. Such a problem is usually accompanied not only by rustling, but also by strange knocking and clanging noises.
If you hear strange sounds from the washing machine that have not occurred before, then you need to check the cross. To do this, you will have to dismantle and “halve” the tank. However, it is not necessary to disassemble the device to suspect failure of key elements. For example, if the damage to the shaft is serious, then the bearing assembly will begin to deteriorate, which will be indicated by rusty smudges on the back wall of the washing tank.
If the crosspiece and bearing assembly are faulty, then sandpaper and temporary measures will not help. In this case, you will have to completely stop using the washing machine until the repair is complete. To assess the condition of the machine, conduct a thorough diagnosis.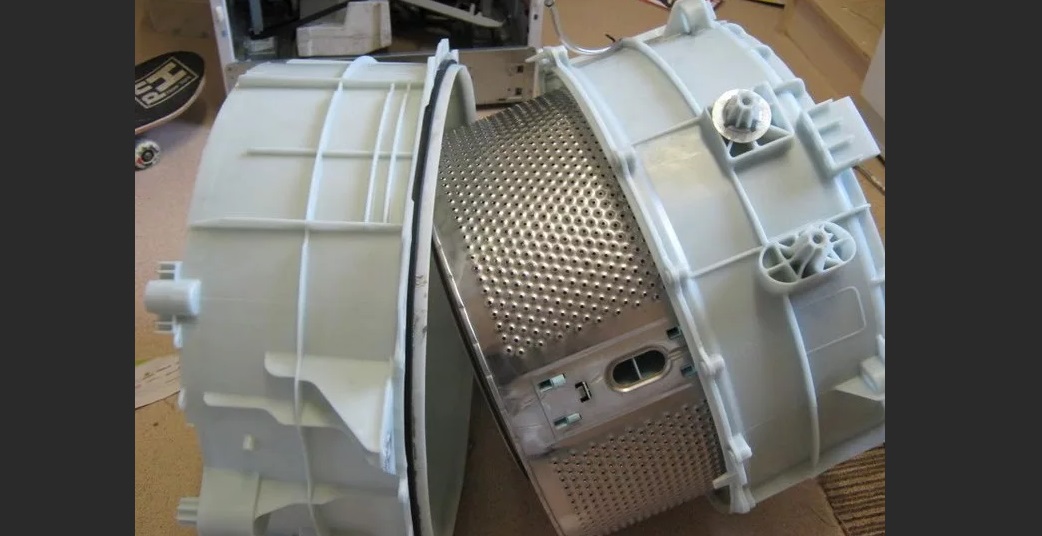
- Completely disconnect household appliances from all communications.
- Disassemble its body and remove the tank.
- Unscrew or cut the tank into two halves, depending on the model of the washing machine.
- Remove the drum and inspect the cross.
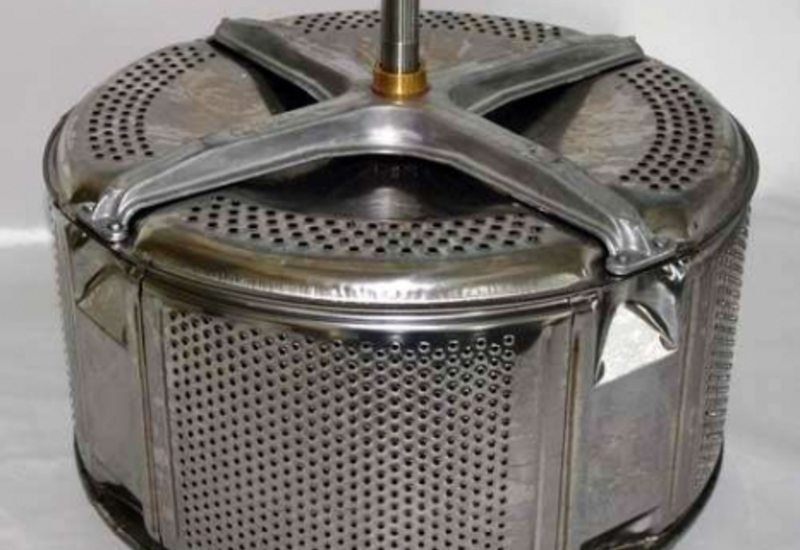
If a part is broken, it must be replaced. Unscrew the three screws that hold it in place, and then remove it from the grooves, carefully using a screwdriver and hammer. Buy a new crosspiece only after you take out the old one and find out its serial number, so as not to accidentally make a mistake with the choice of part. Fix the element on the shaft yourself, or call a service center specialist if you are not confident in your abilities.
Interesting:


Reader comments
- Share your opinion - leave a comment
Categories
Washing machine repair


For buyers


For users


Dishwasher


Add a comment